Building a multi-package project with flutter
Learn from my mistakes and create a multi-package scalable architecture in Flutter.


Hi, my name is Rodrigo Martins, I'm a senior software engineer at EBANX, and I'm here to share a little bit about the latest project that I'm working on.
The main idea of this project is:
Run the application in multiple countries from Latin America, and to do that we need to have a well-designed and modular architecture. And this imposes some challenges like, the signup feature from Argentina is different from the signup flow of Chile, so we need to split features by package for example:
sign_up_ar sign_up_ch
So in our application, we can use some sort of coordinator/navigator based on the locale that the app is running to understand which package we need to use.
We spend some time thinking and creating POC's (proof of concept) about how the architecture must be to accomplish that goal, and in the process, we ask ourselves questions like:
- Are the responsibilities of the major areas well-defined and appropriate?
- Is the collaboration between major components well-defined?
- Is coupling minimized?
- Can you identify potential sources of duplication?
- Are interface definitions and constraints acceptable?
You can find those questions on pragmatic programmer
Explaining folder structures
The folder base structure of the application can be resumed in a mono repository with:
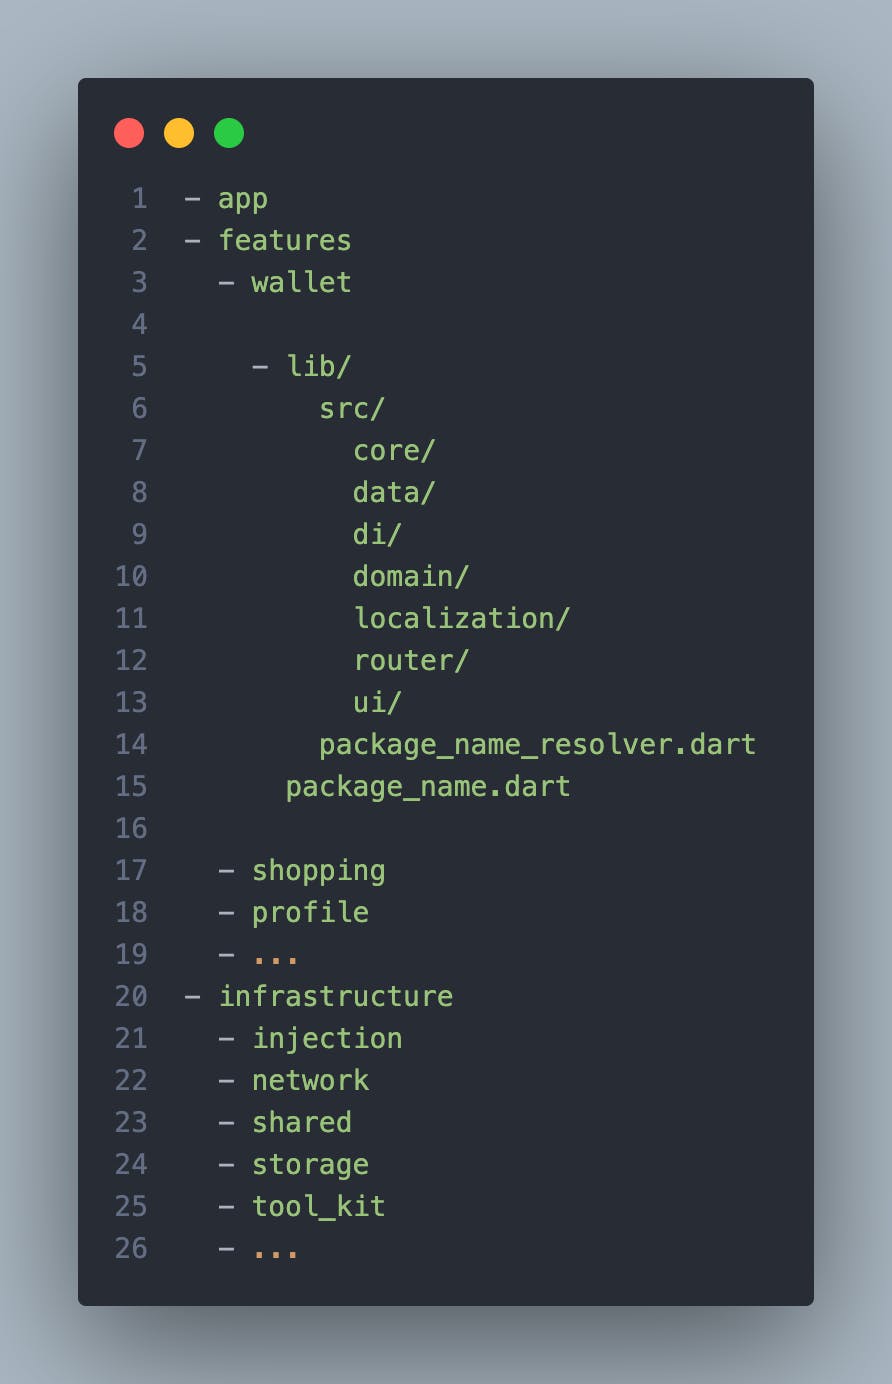
The structure inside the wallet packages is an example of how we create features modules, we follow the same folder structure on each feature or infrastructure package that we create. Each folder is optional, so if the package does not need domain or data, it will not have it.
/App
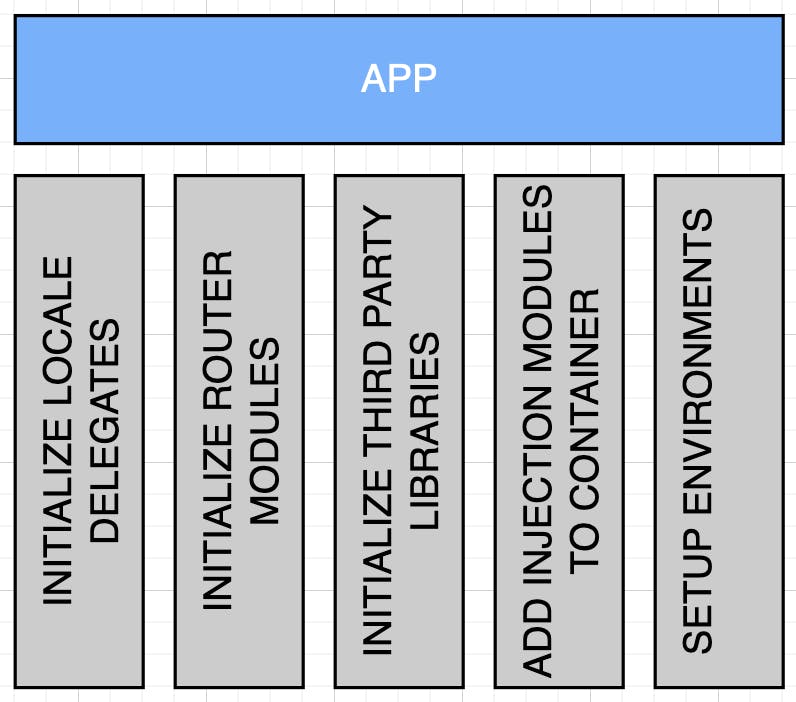
This folder has the main application, where we:
- Define environments (run in development or production)
- Start the injection container (registry each package inside getIt)
- Initialize all location delegates from each package
- Setup all routes
- Set up the application theme
- And initialize third-party libraries
This module knows every feature module, so it can initialize them, but we do not have feature code inside it, all features are inside a single package self-contained with all the logic that they need alongside the dependencies that they need like, network, storage …
/Features
All the shared and non-shared features that you create you add in this folder.
/Infrastructure
This folder contains all the base packages to use in the app and features, here we have the foundation of the application:
- Network abstractions
- Storage abstractions
- Toolkit (util classes)
- Analytics
- Remote config
- Navigator
- Shared
- …
Explaining the architecture
The architecture of the application follows the clean architecture patterns, in case you want to read more about it here.
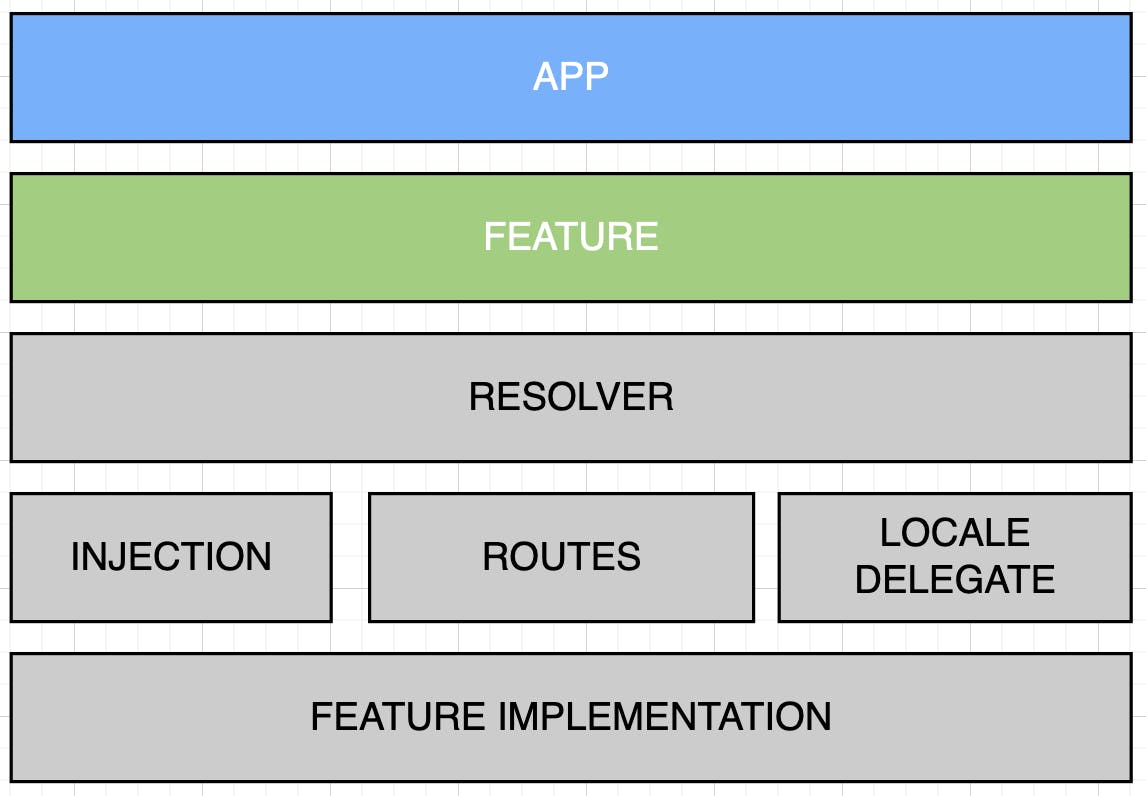
Resolver
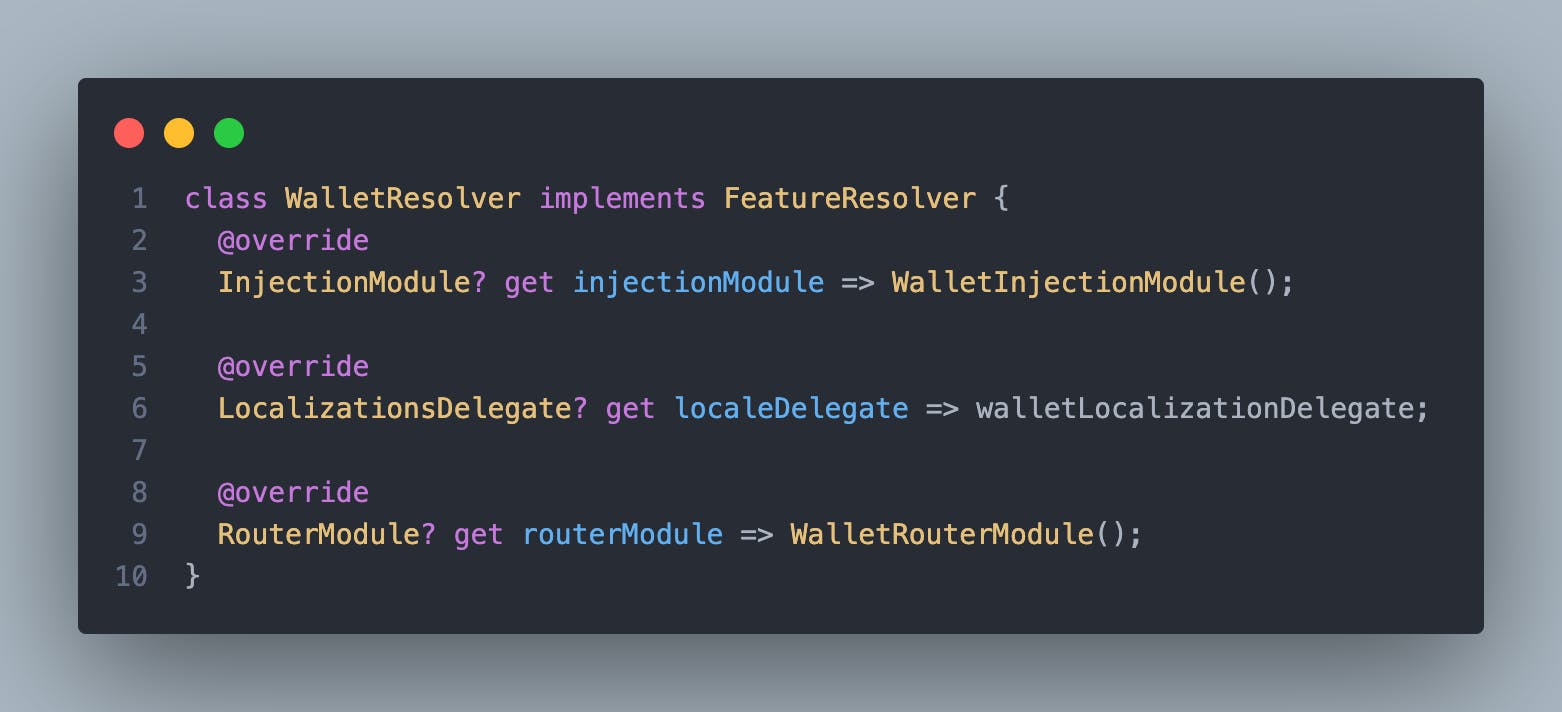
The resolver is an abstract class that defines three base variables:
- get router modules
- get localization delegate
- get injection module
The main purpose of the resolver is to wrap the initialization classes from each package and expose it to the main application. Using it, we can avoid exporting three different classes from the package and export only the resolver.
The variables are optional because some packages could not have routes or locale delegates, so it does not need to override it.
Injection
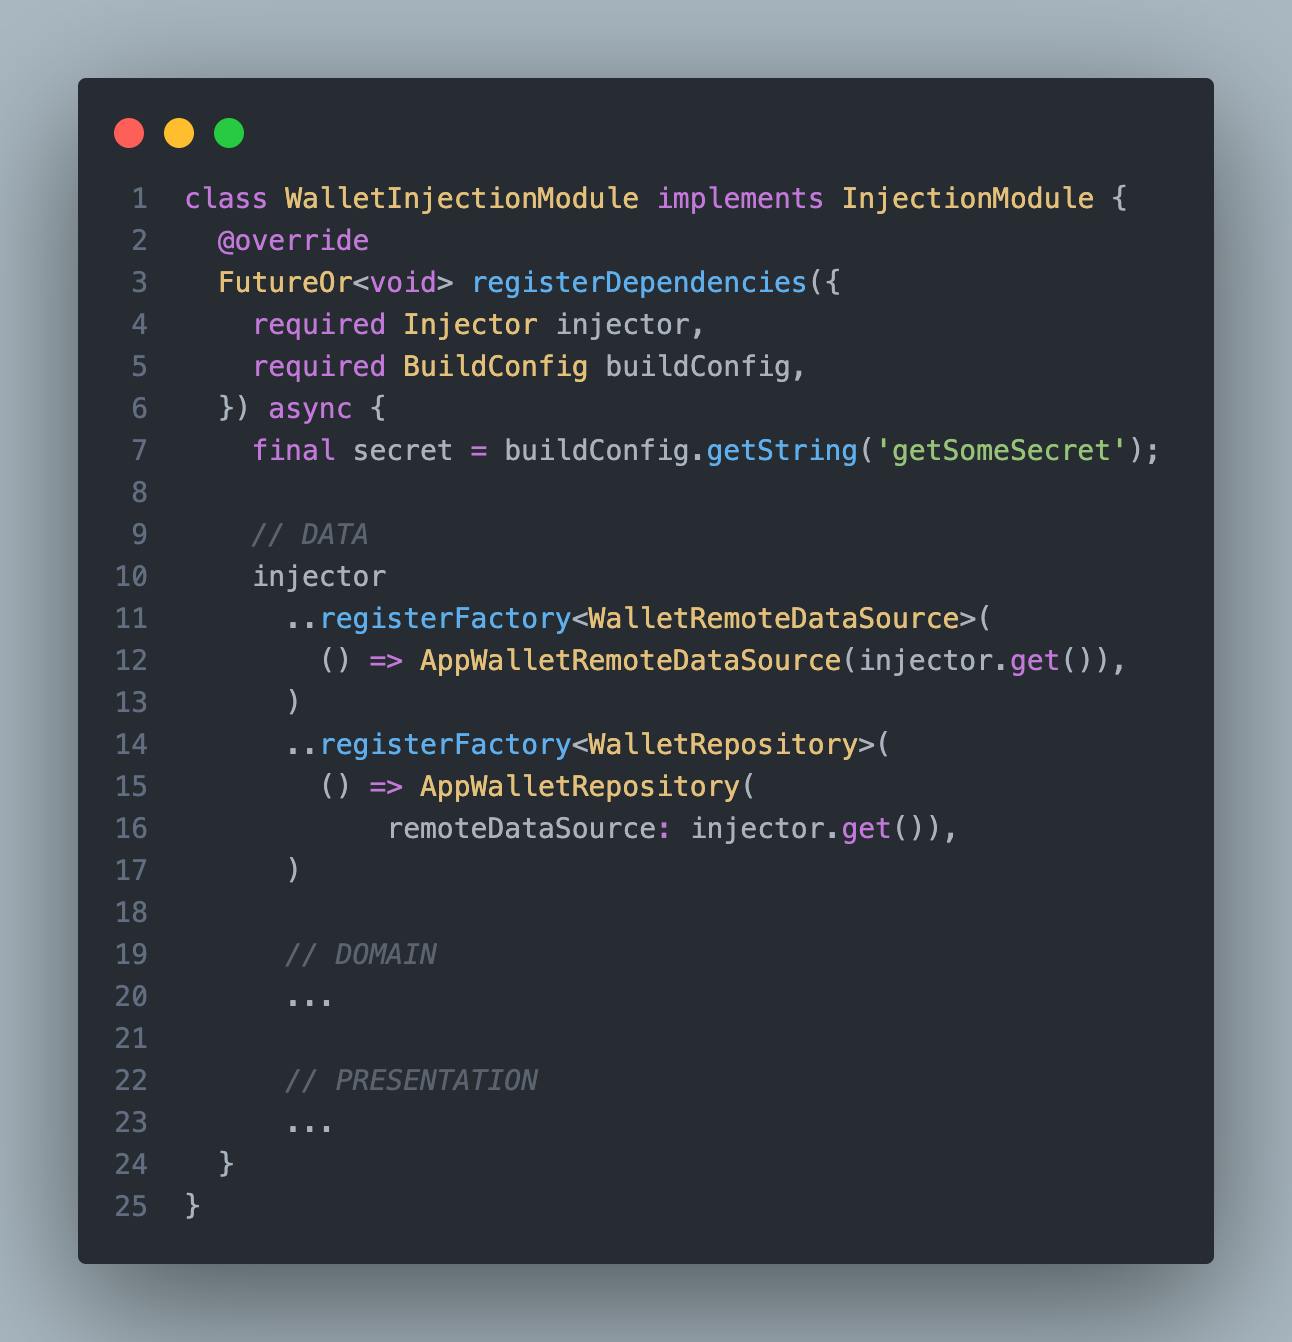
The injection class is a concrete implementation of the InjectionModule abstract class, where we can register all the package dependencies. Later, inside the main application, we will get every injection module to iterate through it to inject them inside the GetIt container.
Injection Component
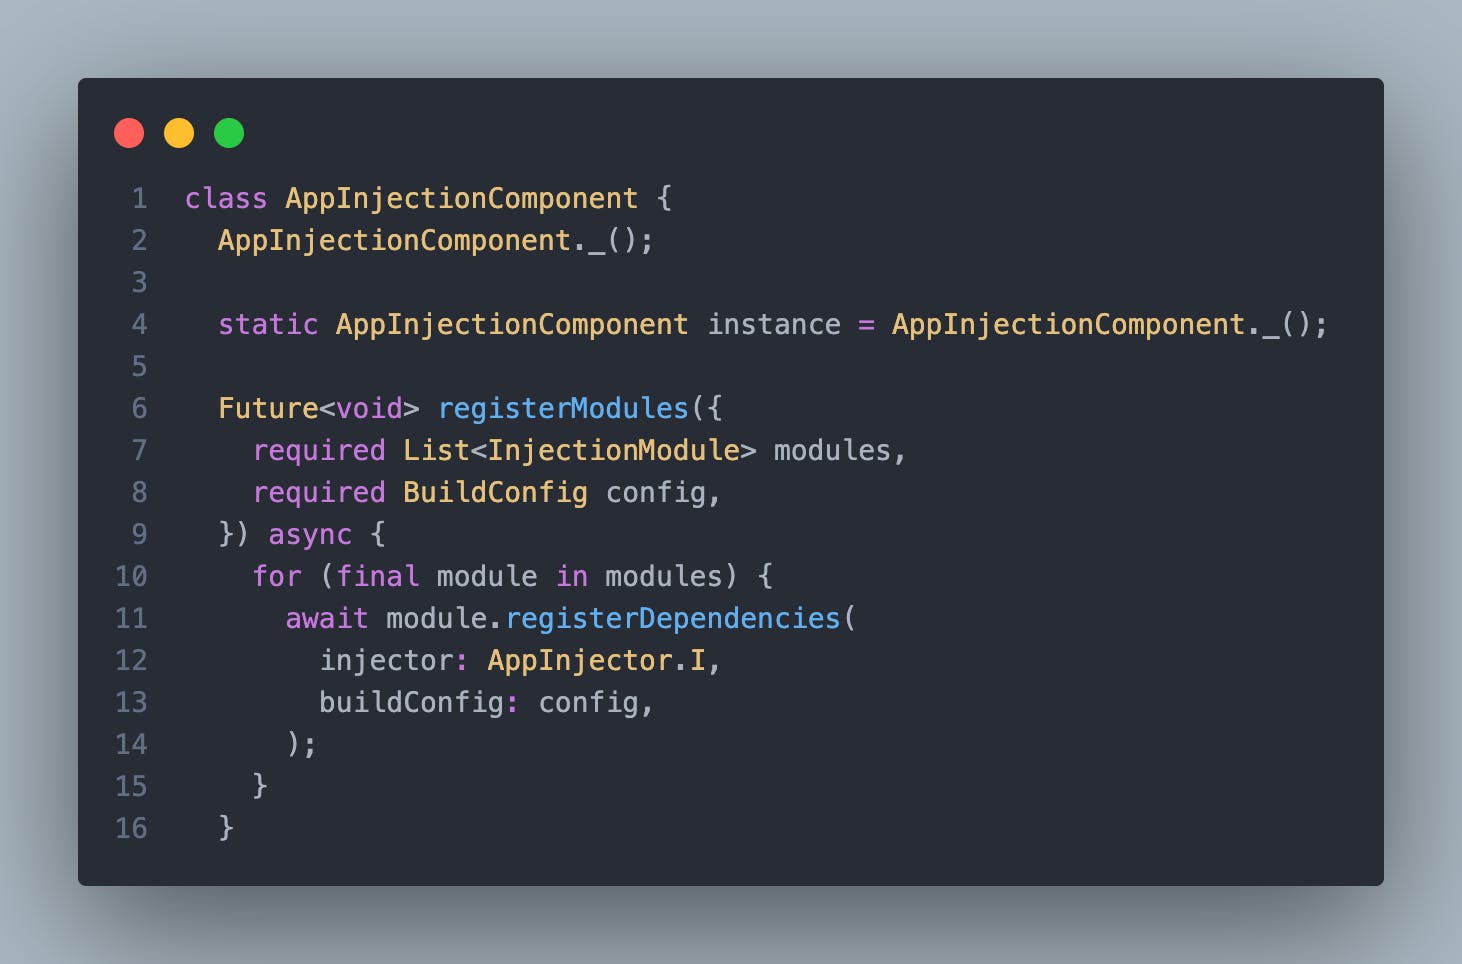
This architecture was inspired by Dagger, a dependency provider for Android. In our AppInjectionComponent we have some logic to initialize every dependency module that was provided by the resolvers of each package, it is a for that iterate through the modules calling the method to initialize the declared dependencies.
You can read more about dagger here.
Routes
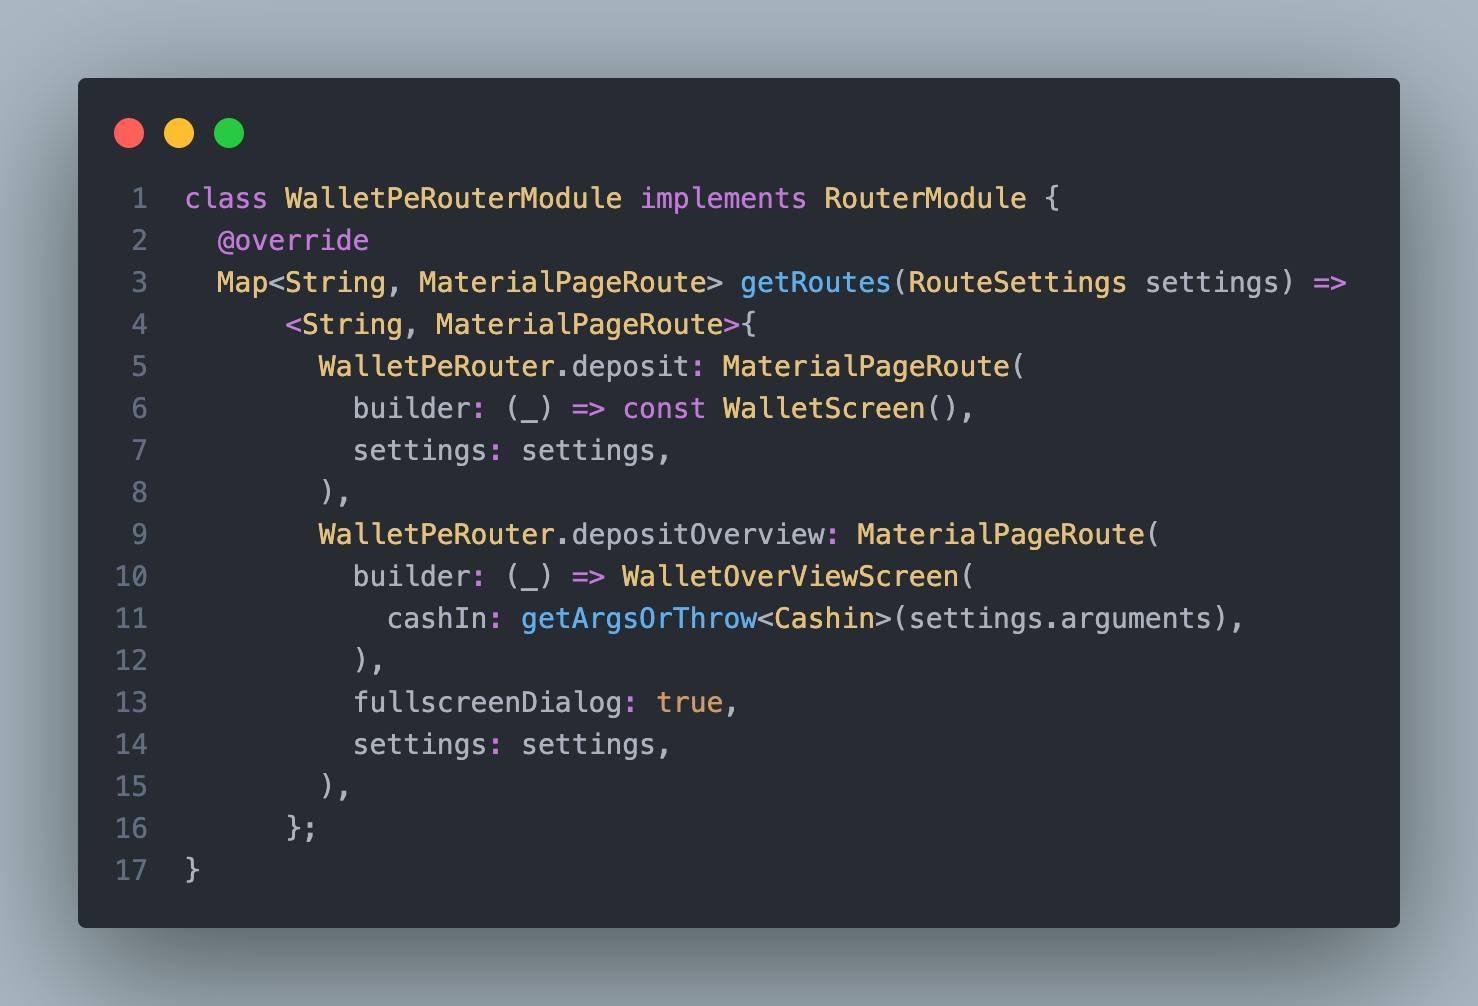
With the router module, we can declare every route that our application needs to know, so for each package that has screens we need to declare them, otherwise, if you try to navigate to them Flutter will crash. This is a simple implementation where we create a map that contains the route (String) key and a PageRoute as value, so in the onGenerateRoute method, we look through the route and return the page.
The method getArgsOrThrow is an util method to cast the setting.arguments in the type needed in the screen, and if fails throws an error. Some screens have optional parameters, so we have the method tryToGetArgsOrIgnore.
Locale Delegates
Locale delegates are used to get the strings that we define on a .json file and parse them to a map, so when we look for a key in our view the localization abstraction will get the string by keys. Each package has his .json file containing all the messages for that module.
We also have a shared package where we define common messages through packages.
In some cases when you require a piece of code that can run on multiples modules the first solution is to create a shared module, but when you do that you need to create boundaries in this shared module because with time it starts to grow until a moment that you do not have control anymore over the module.
And a second drawback of using shared modules is, if you change code inside the shared module, you will need to compile every other module that depends on it.
So sometimes it is better to have code duplication than a shared module. This is one of the concepts in software engineering that need to be decided using the context of your team, project, and needs.
Common Dependencies
We have a package inside infrastructure folder that is called common_dependencies, here we declare all dependencies that are normally used on several packages. In this package we only have a pubspec.yaml and a file where we export those dependencies, so we can use them in others modules. Example of common dependencies:
- flutter_svg
- intl
- flutter_bloc
Navigation
As we have multiple packages in our application we had to create an abstraction for navigation to avoid problems like, one feature module depends on another feature module, doing this is bad because for example, if you have dependencies like this you are allowing the feature to know about the other's features, and we do not need that.
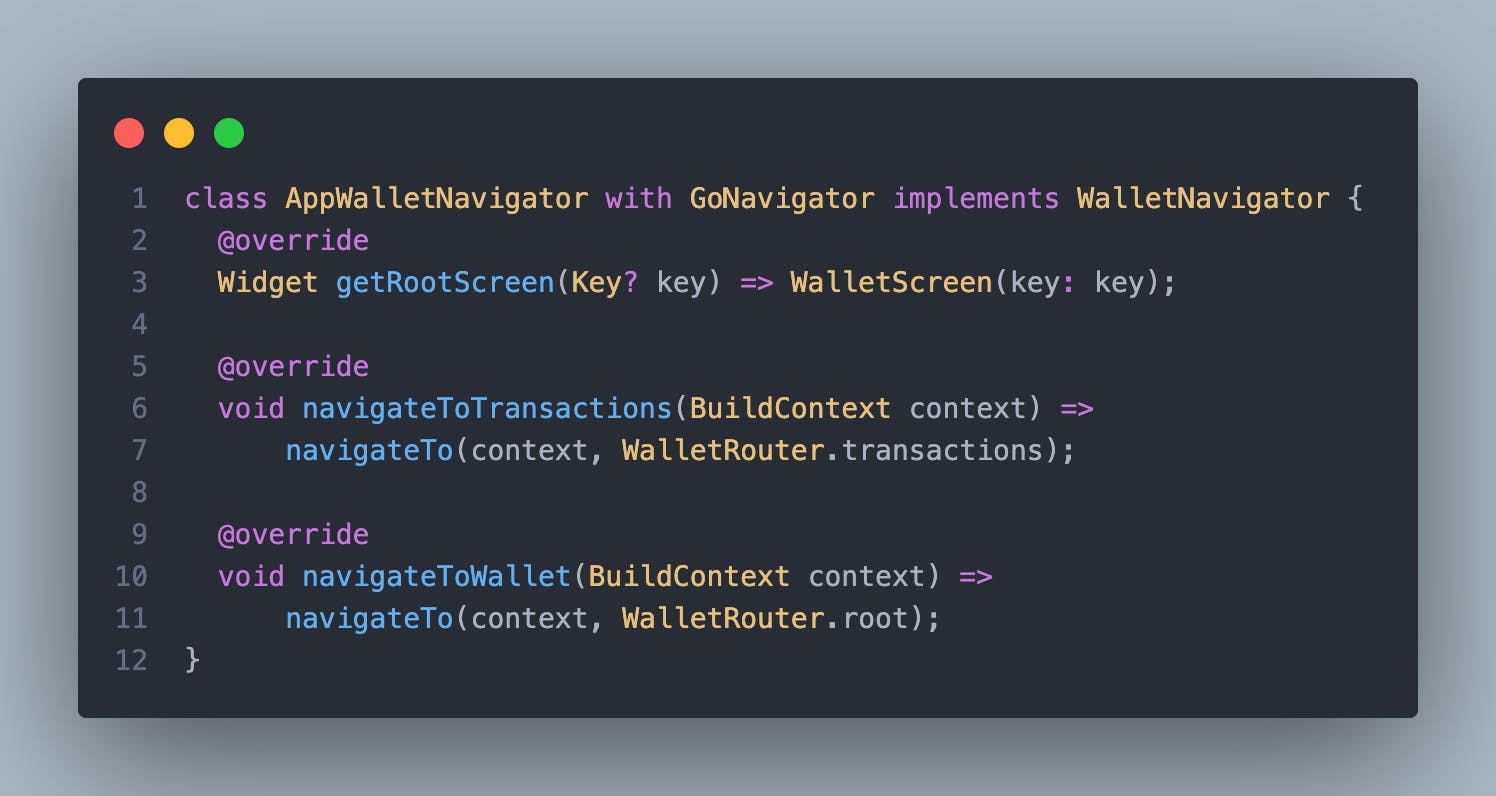
So the solution was to create a navigation package where we define interfaces, routes, and arguments for each package, so when we need to navigate to a new feature, we only use the navigation interface of that feature.
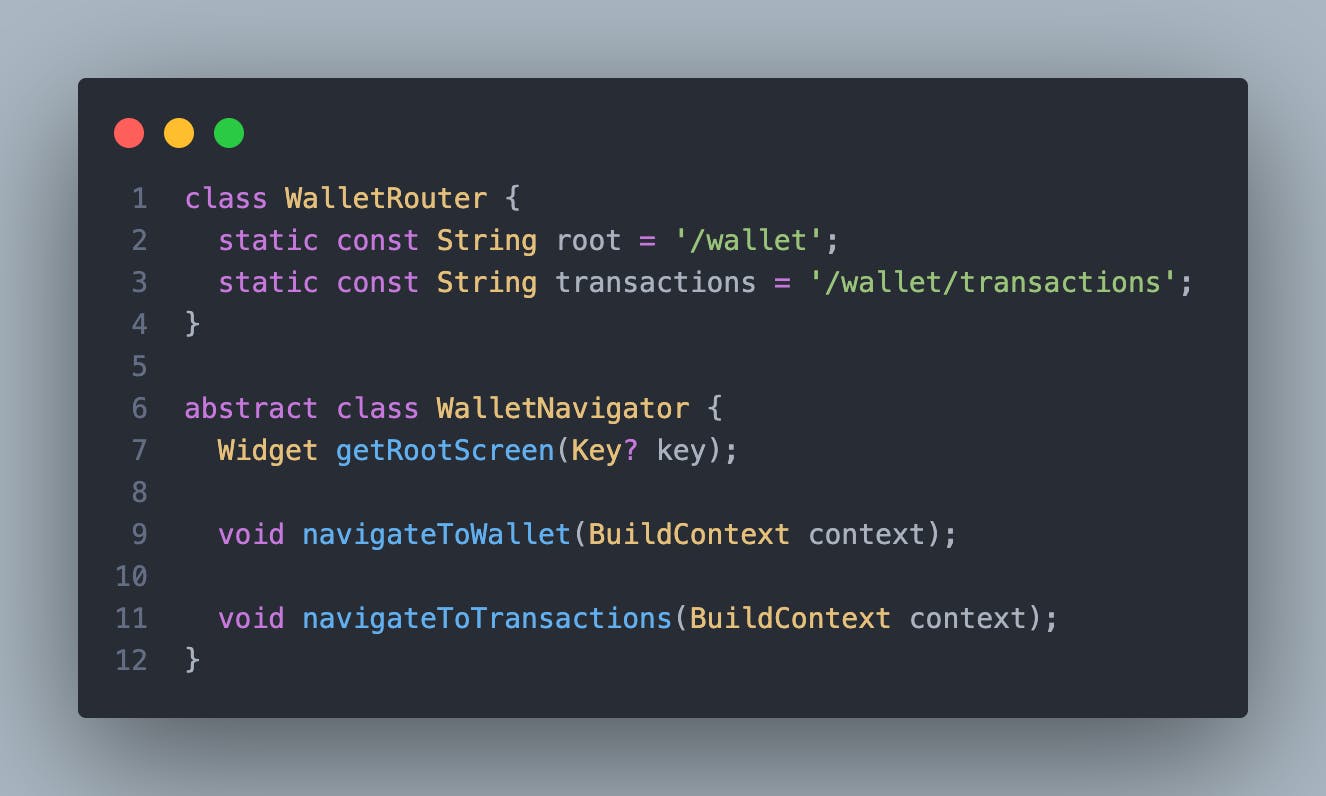
This interface has a concrete implementation inside each package and is injected on GetIt container to be accessed on any package.
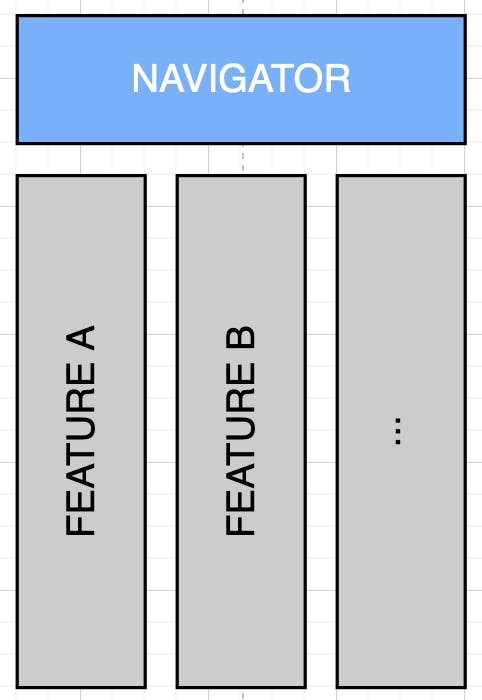
The navigation module is a horizontal module, meaning that any feature can declare it as dependency and use it.
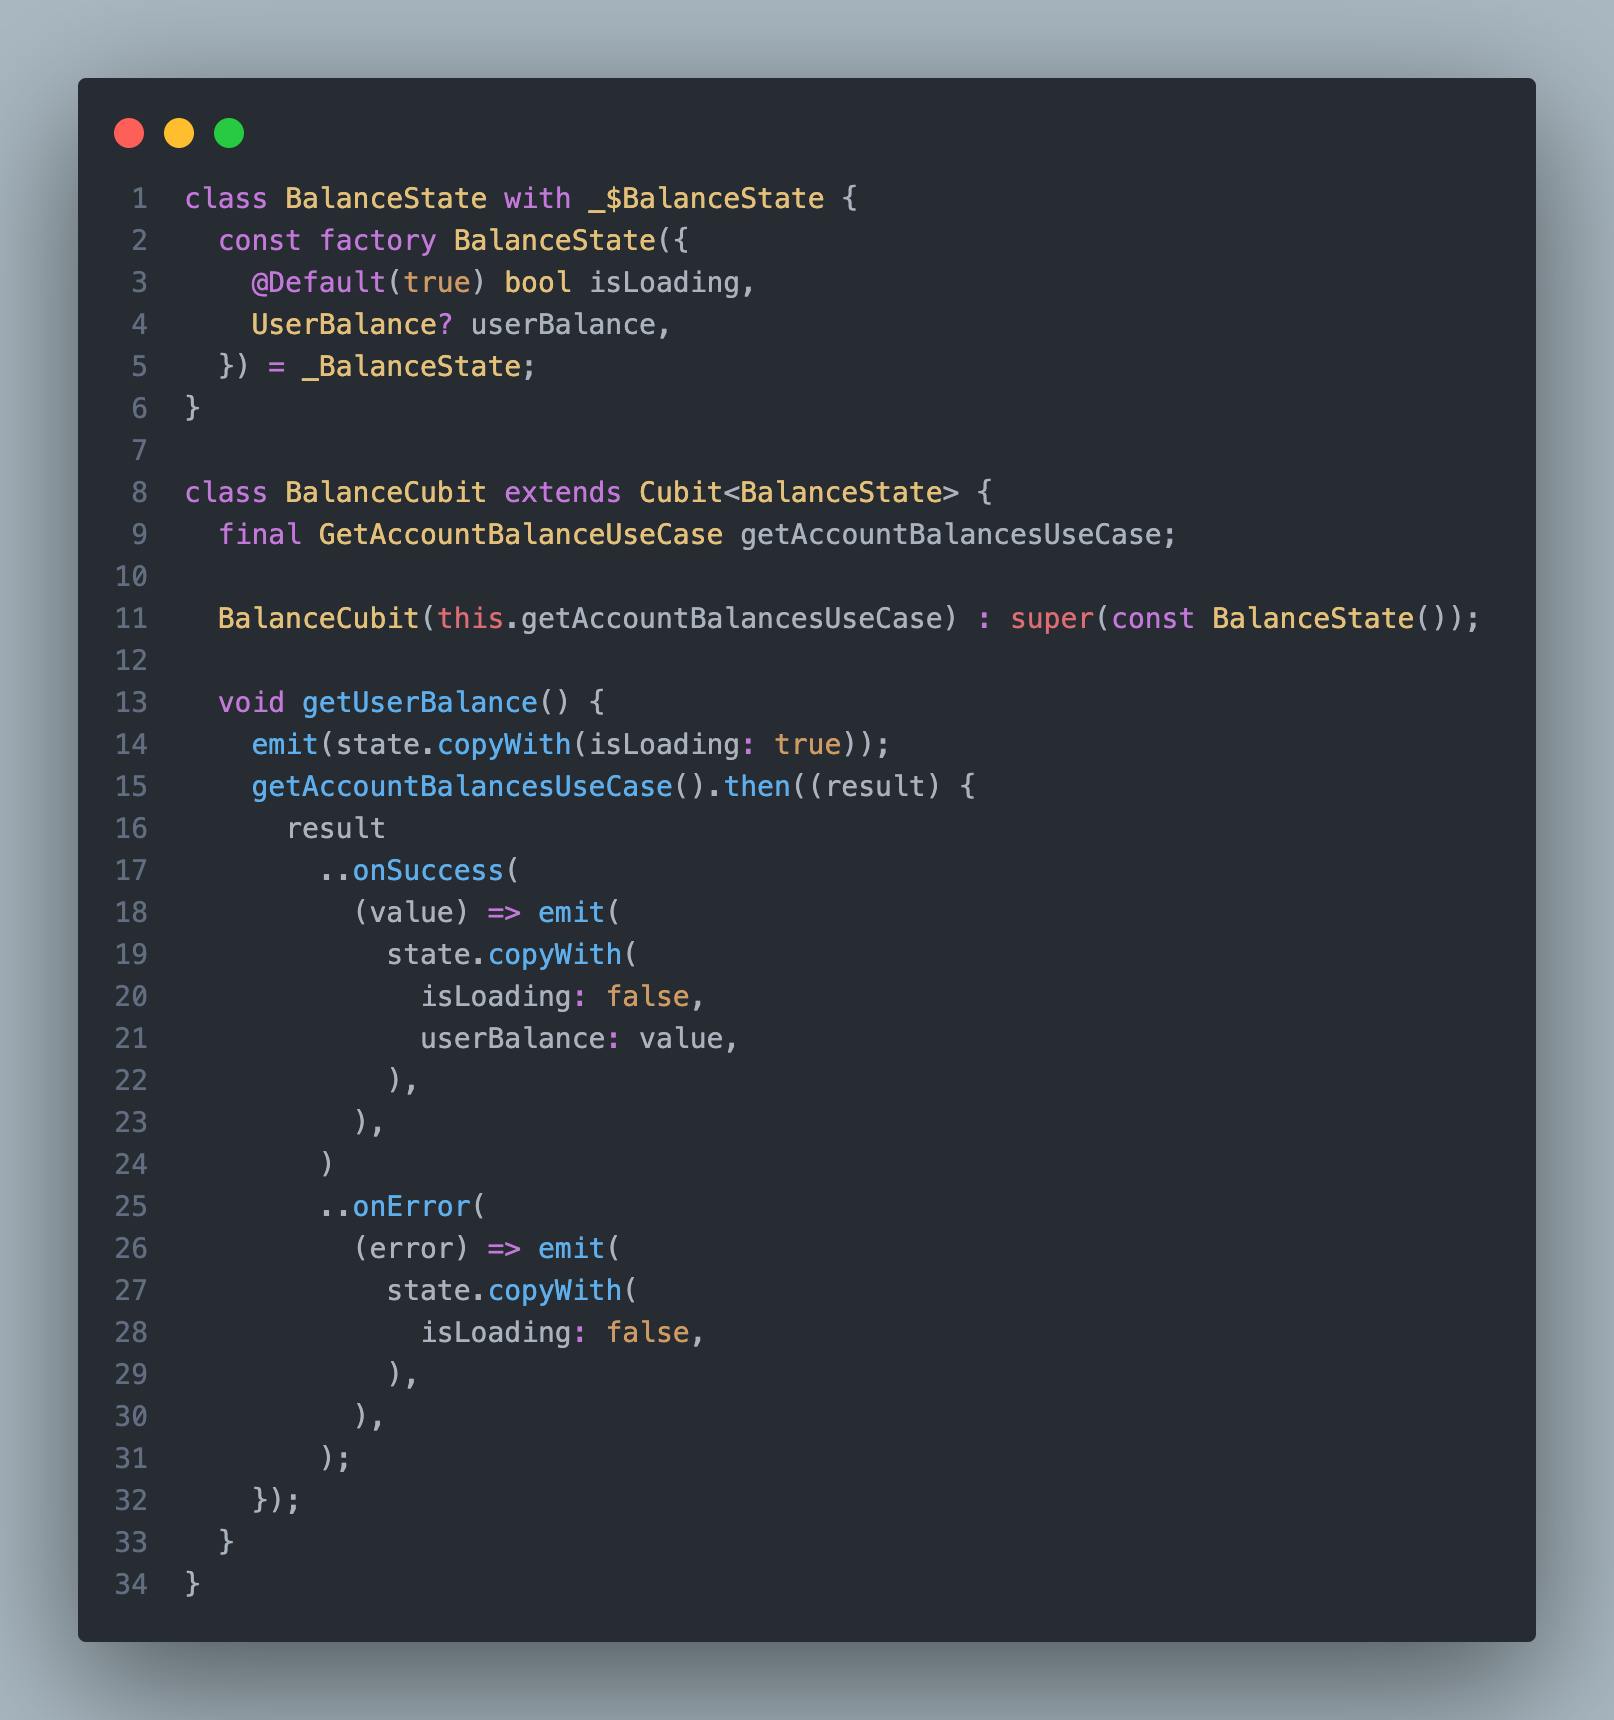
State Management
Currently, we are using the flutter_bloc library to manage the state in our views, but we are limiting the use of only cubits due to the more code that we need to generate or write using bloc. But as I said before, each feature/squad is free to implement what makes more sense to the team and the feature.
Dependency Injection
To provide dependencies in our application we are using getIt that it is a service locator where we register our dependencies in the Injection modules. One of the downsides (currently version while writing this article) of getIt is that we can not declare dependsOn for instances for example, if class A depends on class B, you need to declare class B before A, so if someone changes the order of the declared dependencies you will have problems. The injectable package provides a dependsOn for singletons which are asynchronous but only for those cases.
You can read how to use getIt getIt
Package Management
As we have multiple packages and the goal is to have much more, we needed something to help us control the dependencies in our packages, at first we were using scripts that iterate through the packages running commands like flutter clean or flutter pub get, but this solution does not scale, so we hear about melos:
A tool that helps you manage monorepo with multiple packages.
You can read the melos documentation here
Environments
In our application we need to have flavors on Android and targets in iOS for test purposes, so we have created one structure BuildConfig that abstracts some environment configurations for each building type that we are running, production, or staging, this class is provided in our injection modules so we can configure each dependency as we want. We define variables like:
- server URL
- tokens
- secrets
- …
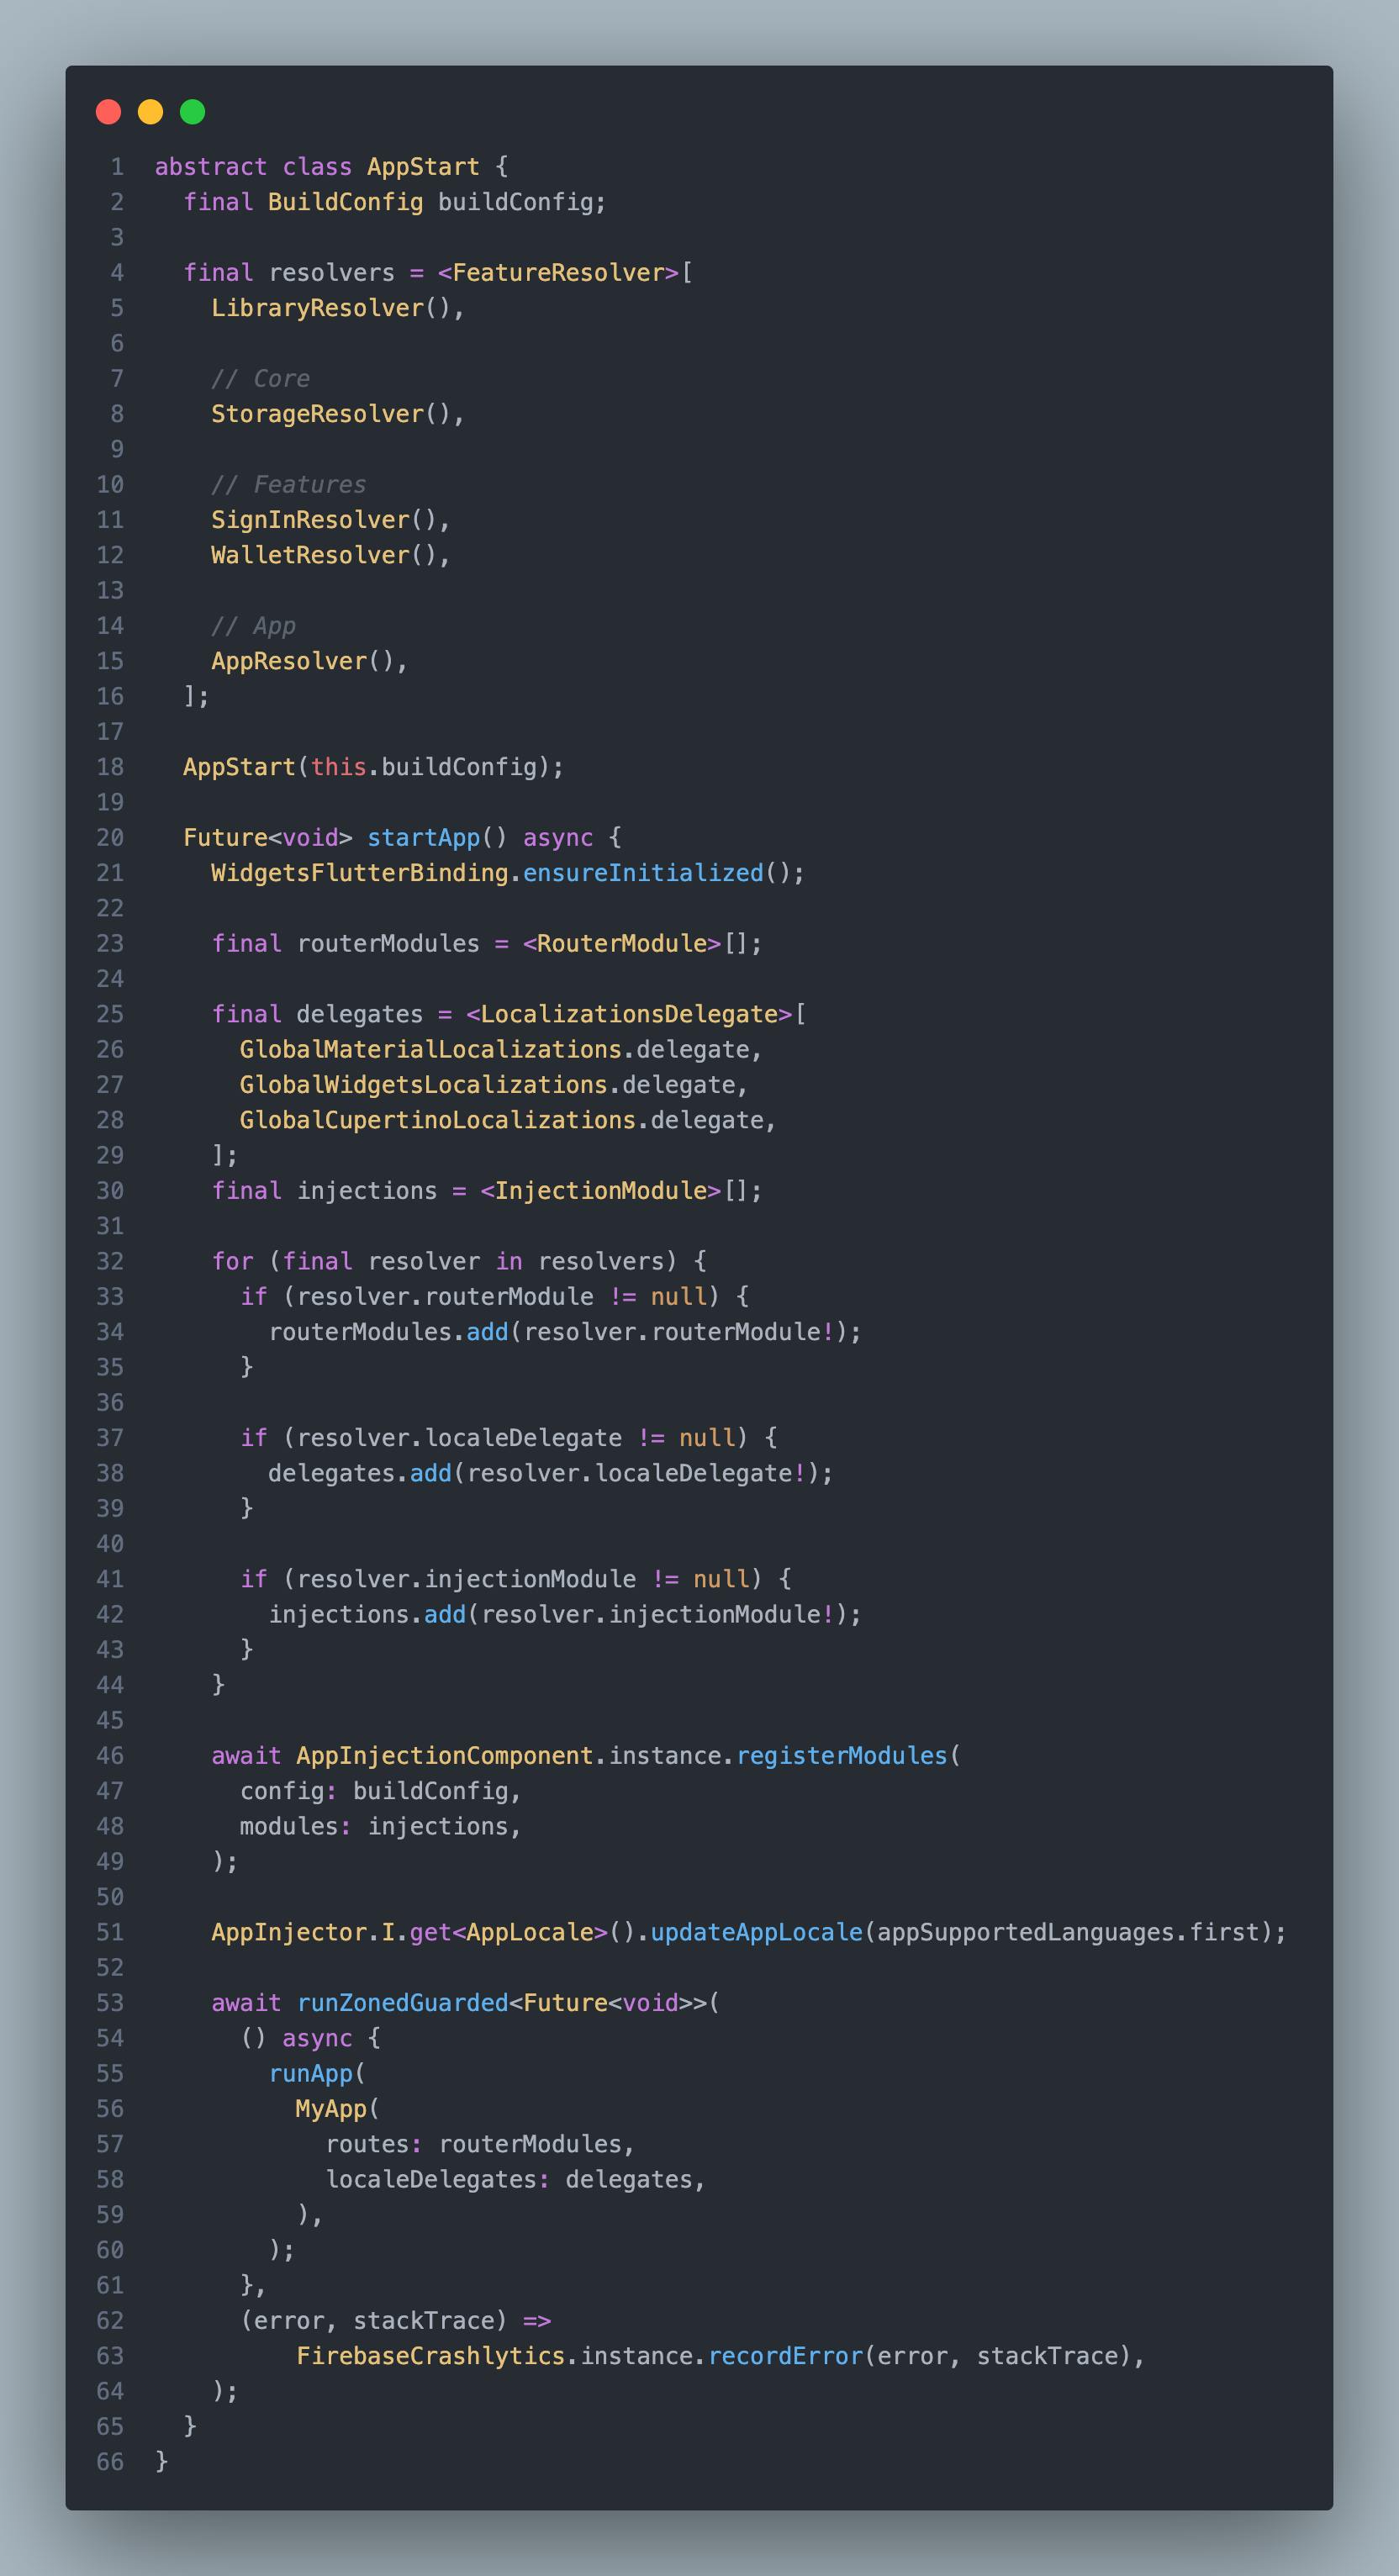
We have one class that receives the build config and start the application.
AppStart
Here we define a list with all our resolvers from each package, and we iterate through it getting, injection, router, and delegates modules, so we can initialize each one of them.
ProductionApp
This is the file where we initialize the production environment, the staging will be the same, but instead creating an instance of StagingBuildConfig.
ProductionBuildConfig
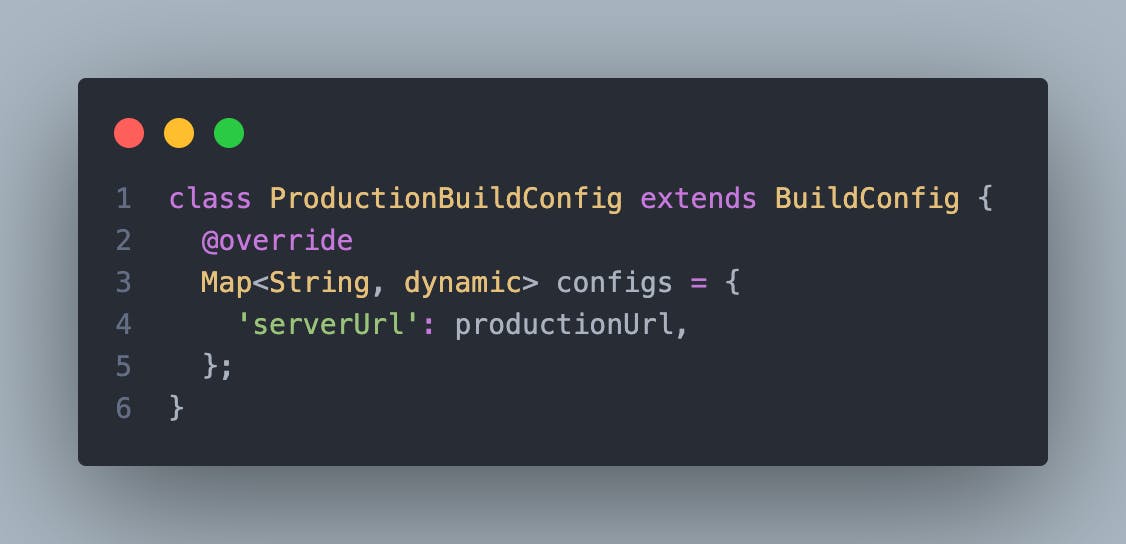
Inside the BuildConfig class is just an abstract class where we define the configs variable and utility methods to retrieve values from the map with a safe typecast.
In this article, you can read how to implement flavors in a flutter application.
Remote Configs
As we declare all third-party libraries in the main application we avoid injecting them on feature packages, so on every feature, we create an interface that declares base methods to return the values that we need from a remote config provider.
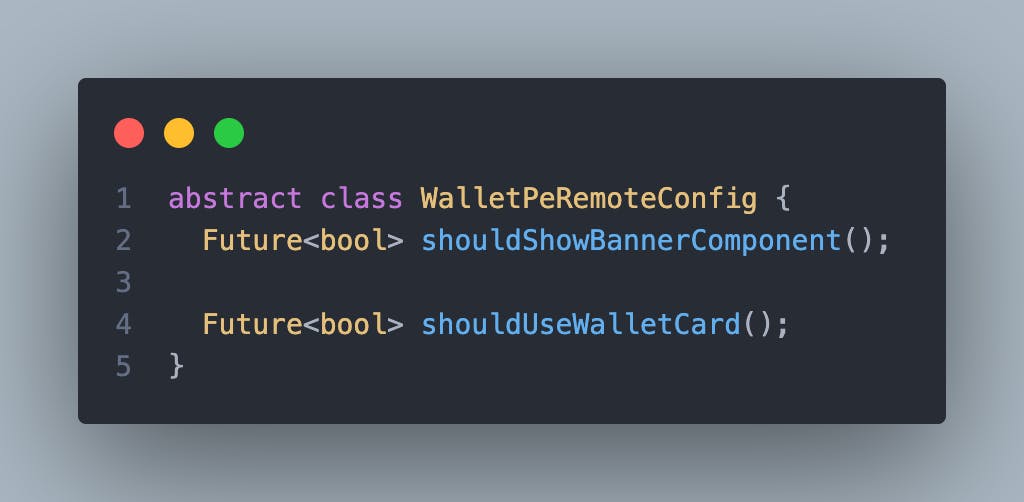
In the main application package, we implement this abstract class using the remote config provider to get the values, in this case, we are using Firebase.
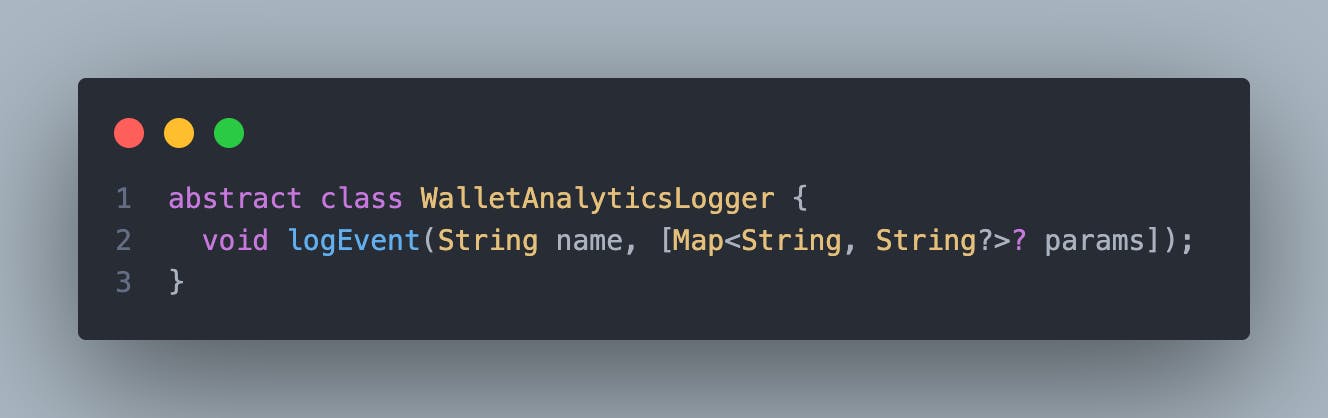
Analytics
For analytics events we use the same approach as remote configs, but with a different method signature. We implement this interface on the main application and use the analytics provider which can be Firebase or Adobe.
CI/CD
In our project, we decided to follow the trunk base development so we have only one branch that we push code every day.
We have two different CI pipelines
- The first one runs with Github actions (that validate, lint, formatting, and unit testing)
- And the last one runs with Bitrise, this one generates staging and production build that can be deployedto Bitrise and we test or directly to the stores.

Conclusion
That's it, I hope it helps you at least a little bit in your flutter projects, this solution is not final and it is not perfect, we are working every day to improve it.
Feel free to comment and give suggestions positive or negative about the solution. Thanks.
Sample repository can be found here
#flutter, #pipeline, #cd, #android, #ios, #mobile, #release, #ci, #module, #package, #architecture, #solid, #clean, #abstraction, #layer, #application, #injection